Recovering lost sales from abandoned carts is crucial for maximizing your revenue. With ClickFunnels workflows, you can create a tailored sequence that re-engages customers who have left items in their cart without completing the purchase. In this article, we’ll walk you through the steps to create an abandoned cart sequence, explain the strategy behind it, and show you how to implement it effectively using workflows.
Requirements
An active ClickFunnels account
A checkout page is needed in a funnel with a product attached to it.
What is an Abandoned Cart Sequence?
An abandoned cart sequence is a series of automated follow-up messages sent to potential customers who have added products to their cart but have not completed the purchase. The goal of this sequence is to remind them of the products they left behind, incentivize them to complete the purchase, and address any potential objections or issues they may have encountered.
Example:
Imagine a customer visits your funnel, visits the checkout page in the funnel, but leaves the page without completing the purchase. An abandoned cart sequence in workflow can trigger and automatically send them a series of emails over the next few days, reminding them of the items in their cart, offering a discount, or providing customer support to help them finalize their purchase.
Strategy Behind the Abandoned Cart Automation
An effective abandoned cart strategy involves understanding why customers abandon their carts and addressing those reasons through targeted messaging. Here’s a common scenario:
Initial Interest: A customer shows interest in a product by either viewing the checkout page or opting into a relevant offer but does not complete the purchase. This initial action—whether it’s a page visit or an opt-in—triggers the opportunity for follow-up. The abandoned cart sequence can then be initiated based on these specific triggers, enabling you to re-engage the customer with targeted reminders or incentives to complete their purchase.
Reminder: After a set period (e.g., 1 hour), a reminder email is sent, nudging them to complete the purchase.
Incentive: If there’s no response, a follow-up email might offer a limited-time discount to encourage action.
Support: Another email could offer customer support, addressing common concerns or questions about the product.
How to Create an Abandoned Cart Sequence Using Workflow
Open Your Workflow:
From your ClickFunnels dashboard, navigate to the Automations » Workflows menu.
Open an existing workflow or create a new one.
Set Up the Trigger:
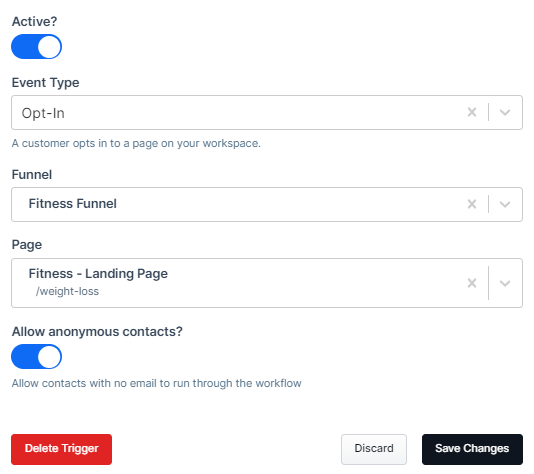
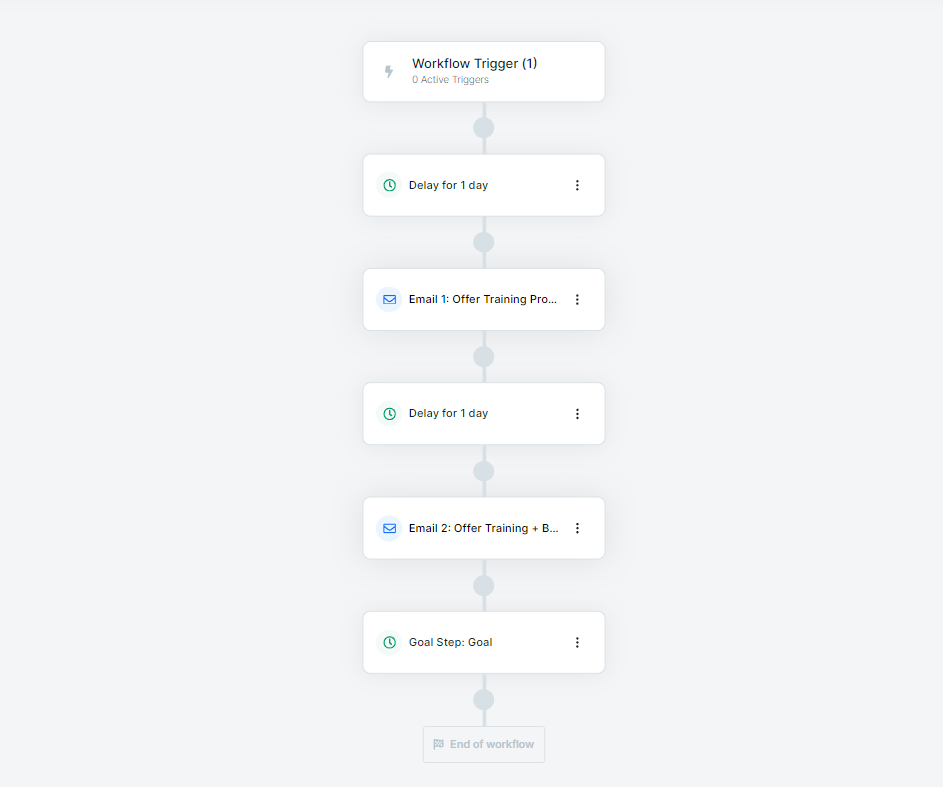
Choose the appropriate trigger to start the workflow. For an abandoned cart sequence, consider using an Opt-In or Pageview event. The Opt-In event is ideal for triggering the sequence when a contact shows initial interest by opting into a funnel or landing page. The Pageview event is useful for targeting existing contacts who visit the checkout page but do not complete the purchase. Select the trigger that best fits your strategy to initiate follow-up actions effectively.

Add a Delay:
Add a delay step to wait for a specific time period (e.g., 1 hour, 24 hours) before sending the first follow-up email.
NOTE
It’s important to allow enough time for the contact to complete their purchase before triggering a follow-up email. An hour is often considered a standard delay, but the optimal waiting time can vary depending on your business strategy and the nature of your product. Consider your audience’s buying behavior and adjust the delay accordingly to avoid sending follow-up emails prematurely.
Create Follow-Up Emails:
Design a series of emails that will be sent as reminders. These could include a simple reminder, an offer of assistance, or a special discount.
Use the “Conditional Goal” Step:
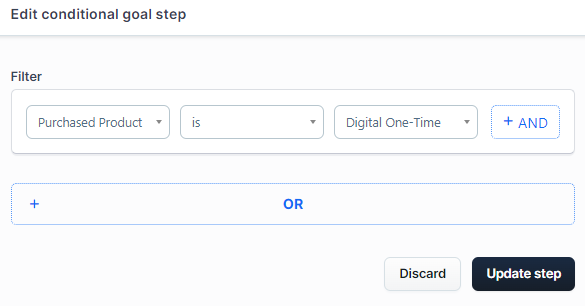
Add a “Conditional Goal” step at the bottom of the sequence to check if the customer has completed the purchase. If the goal conditions are met, the workflow will immediately skip any remaining steps before the goal.

Learn more in the Workflows “Conditional Goal” Step - Redirect Contacts Based on Goals article.
When to Use the “Conditional Goal” Step?
The “Conditional Goal” step is crucial for your abandoned cart sequence, ensuring that customers who complete their purchases are not subjected to unnecessary follow-up emails. Ideally, place this step at the very end of your sequence. This placement allows the sequence to stop once the purchase condition is met, preventing any further actions.

However, if a contact reaches the “Conditional Goal” step without meeting the purchase condition, the workflow will continue to the next steps.
IMPORTANT
Since the “Conditional Goal” step does not act as a pause point, it’s crucial not to place any critical workflow steps (e.g., success email, buyer tag etc) after this step that should be executed only if the contact has met the goal. Contacts who have not completed the purchase and reach the “Conditional Goal” step will move forward beyond it, so ensure the workflow ends appropriately after the goal step to avoid unwanted actions.