SendGrid is a popular email service provider that allows you to send transactional and marketing emails through its SMTP service. Integrating SendGrid with ClickFunnels enables you to use its powerful infrastructure to deliver emails efficiently from your ClickFunnels workspace. In this article, you’ll learn how to connect SendGrid as your SMTP provider and ensure proper email sending from ClickFunnels.
Sending emails from ClickFunnels, with or without using an SMTP, is designed solely for outgoing emails. ClickFunnels does not provide a mailbox for receiving replies. If your audience replies to an email sent from a custom email address in ClickFunnels, the response will not be received within ClickFunnels.
To handle replies, you will need to set up a mailbox for your custom email address with an external service, such as Google Workspace, Microsoft 365, Zoho Mail, etc.
Requirements
An active ClickFunnels account.
A verified domain or sub-domain in ClickFunnels, including both domain and email DNS records, that you want to associate with SendGrid.
A SendGrid account.
Step 1: Create an API Key in the SendGrid Account
In order to connect SendGrid with ClickFunnels, you’ll first need to create an API key in your SendGrid account. This API key will be used SMTP password in ClickFunnels.
Log in to your SendGrid account.
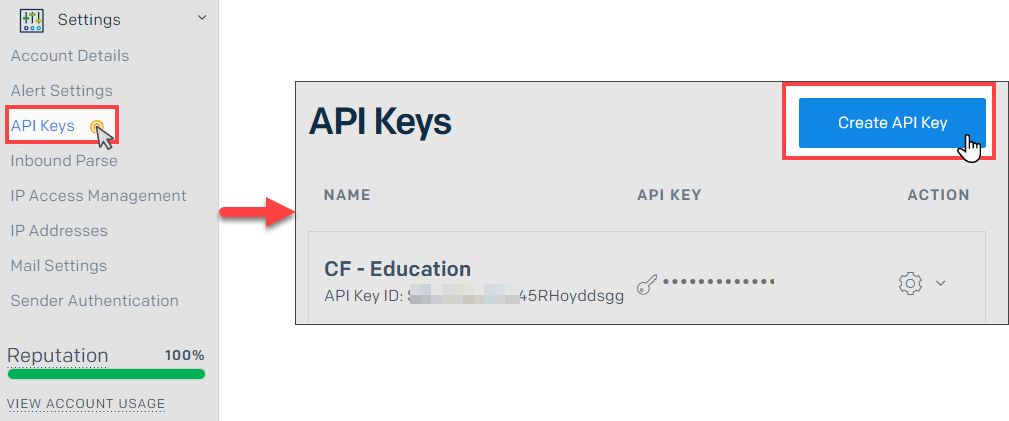
In the left-hand navigation panel, go to Settings menu and select API Keys.
Click the Create API Key button on the top-right of the screen.
Name your API key. For example, you could use something like
CF - Your Workspace Nameto help identify it.Under API Key Permissions, select Full Access. This ensures that ClickFunnels has the necessary permissions to send emails using SendGrid.
Once done, click Create & View.
Copy the generated API key. You’ll need this key to complete the integration in ClickFunnels. You may store it securely as SendGrid won’t show this API key again after this step.
Step 2: Authenticate Your Domain, Sender, and Link Branding
After creating your API key in SendGrid, the next step is to authenticate your domain and set up sender verification and link branding. This process ensures that emails sent from your domain appear professional and can improve email deliverability.
Navigate to Sender Authentication:
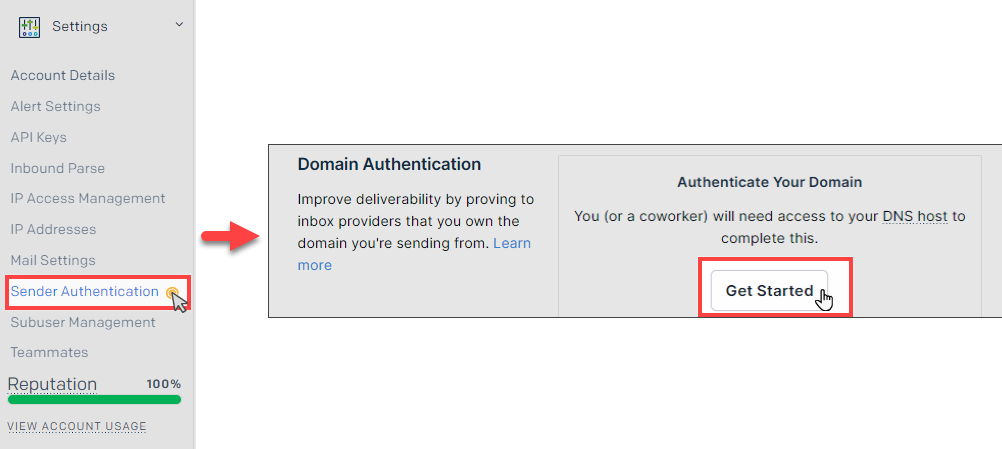
In your SendGrid account, go to Settings in the left-hand menu, and select Sender Authentication.
Authenticate Your Domain:
Click Get Started under Domain Authentication. This will start the process of verifying your domain.
Choose DNS Host:
In the following step, you will be asked to select your DNS host (e.g., GoDaddy, Cloudflare). Select your provider from the dropdown.
You will also have the option to brand your tracking links using your domain. Select Yes to ensure that all links in your emails are branded with your domain name instead of
sendgrid.net.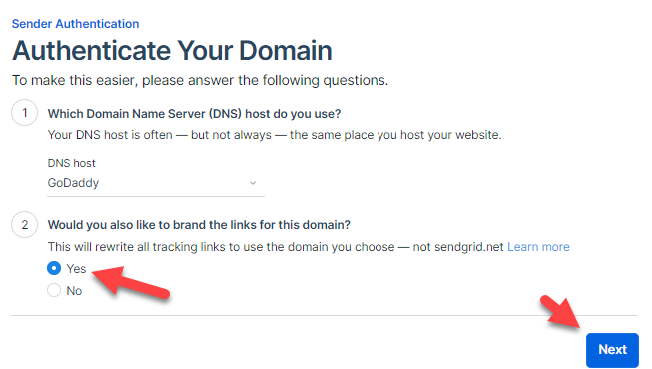
Add DNS Records:
SendGrid will generate several DNS records, including CNAME, TXT, and DMARC, that need to be added to your DNS provider. These records are necessary for domain authentication and link branding. Make sure to add them correctly to your DNS settings.
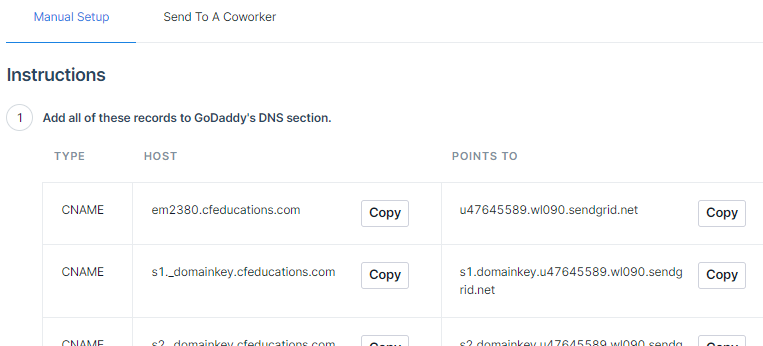
When adding DNS records, some DNS providers may not require you to input the full host value provided by SendGrid. For example, instead of adding
em2380.cfeducations.com, you may only need to addem2380. DNS behavior varies by provider, so if you encounter any issues, it’s best to consult your DNS provider or contact SendGrid support.Additionally, if you are using Cloudflare as your DNS provider, make sure to turn off the Proxy option when adding the records. This will help avoid any verification issues.
Verify DNS Records:
Once the records have been added, return to SendGrid and click Verify to confirm that the records are correctly set up.
Create a Sender:
After your domain and link branding are verified, you need to create a sender. Click Get Started under Single Sender Verification.
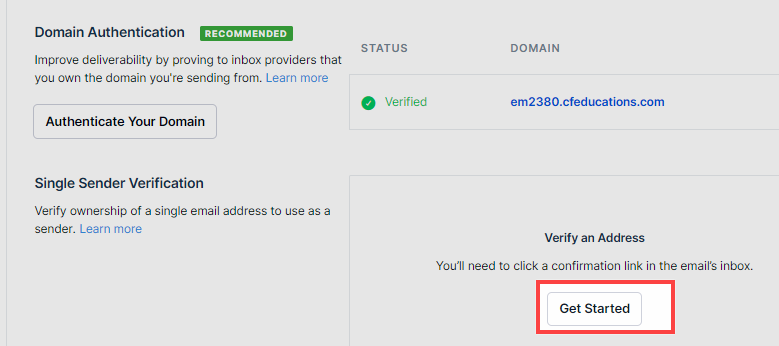 You will be prompted to enter the From Email Address and other details for the sender. Make sure to use the email address associated with the domain you’ve just verified. For example, if you have verified the domain
 yourdomain.com, you can use an email address likesupport@yourdomain.com. Since your domain is already authenticated, the sender will be immediately verified.
Step 3: Add SendGrid as SMTP in ClickFunnels
Once you have authenticated your domain and created a sender in SendGrid, the next step is to integrate SendGrid with your ClickFunnels workspace by adding it as an SMTP provider.
In your ClickFunnels account, go to Workspace Settings and select Email Settings.
Click on the SMTP Settings tab.
.png)
Click the Add SMTP Setting button to start the configuration.
In the new SMTP settings window, fill in the following fields:
.png)
Nickname: Enter a name for this SMTP configuration (e.g., “SendGrid”).
Email Domain: Select the domain you verified in ClickFunnels workspace.
Server: Choose SendGrid from the list.
Port: Enter
587, which is the standard port for SendGrid’s SMTP server.Username: Enter the text
apikey.Password: Enter the API key you created in SendGrid as explained in Step 1 in this article.
Add Webhook for Event Tracking: Copy the Webhook URL provided by ClickFunnels. You will need to paste this URL into your SendGrid account in the Settings > Mail Settings > Event Webhooks section to enable event tracking.
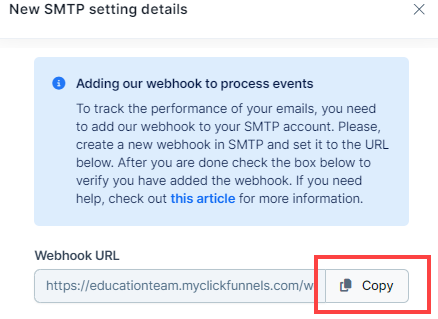
Refer to Step 4: Add ClickFunnels Webhook URL in SendGrid for detailed instructions on how to set up the webhook in SendGrid.
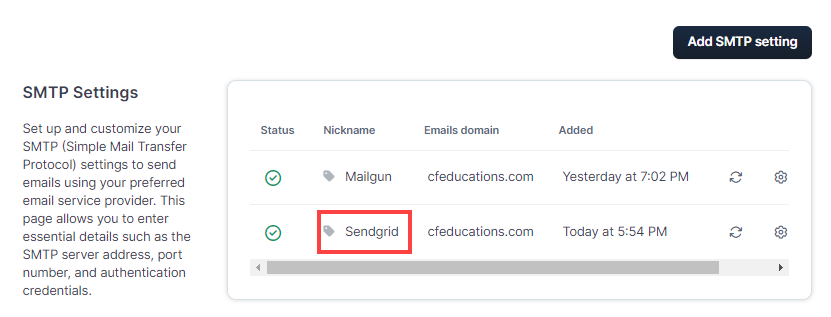
After completing the above steps, click Update SMTP Setting in ClickFunnels. ClickFunnels will verify the connection with SendGrid, and your SMTP status will be updated with a green checkmark.
This document provides instructions and visual references based on the current version of SendGrid at the time of publication. While we strive to keep our documentation updated, SendGrid may update their features or user interface at any time. If you encounter discrepancies between the steps outlined here and SendGrid’s current interface, we recommend visiting the SendGrid Help Center or contacting their support team for the most accurate information.
If you have any questions or need assistance with issues specific to your SendGrid account, such as domain verification or webhook setup, please contact SendGrid’s support team directly for further help.
Step 4: Add ClickFunnels Webhook URL in SendGrid
To track email events such as opens, clicks, bounces, and unsubscribes, you need to add a webhook URL in SendGrid. This webhook allows ClickFunnels to receive event data from your SendGrid account.
In your SendGrid account, go to Settings menu and select Mail Settings.
Under Webhook Settings, click on Event Webhooks.
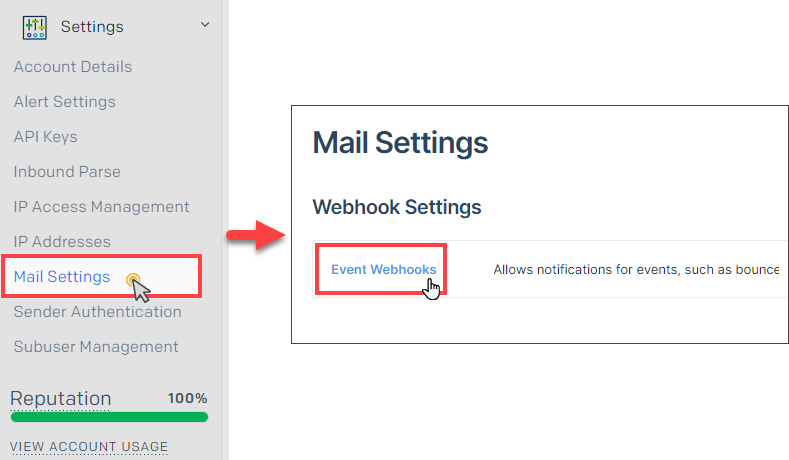
Click the Create New Webhook button to set up a new webhook.
In the webhook settings, fill out the following details:
Friendly Name: Enter a name for this webhook (e.g., “CF - Your Workspace Name”).
Post URL: Paste the Webhook URL provided by ClickFunnels. You can find this URL in ClickFunnels when adding your SMTP settings.
Actions to be Posted: Check the boxes for the events you want to track. These typically include: Opened, Clicked, Unsubscribed, Bounced, Delivered. You may select all events instead of selecting particular events.

After filling in the details and selecting the events, click the Save button to activate the webhook.
How ClickFunnels Utilizes SendGrid SMTP for Email Sending
Once your SendGrid SMTP is successfully connected to your ClickFunnels workspace, the system will display the verified status for your associated email domain.
Any email address created within your workspace, linked to this domain, will automatically use the SendGrid SMTP for email delivery when sending broadcasts or emails within workflows. ClickFunnels dynamically makes this decision based on the connected SMTP and the selected email address.
Example:
For instance, you have verified the domain www.yourdomain.com in your ClickFunnels workspace and set up an email address like support@yourdomain.com. After verifying the domain and DNS records both in ClickFunnels and SendGrid, when you’re ready to send a broadcast or trigger an email step in a workflow, you will choose the email address you wish to send from. If you select support@yourdomain.com, ClickFunnels will automatically route the email through SendGrid’s SMTP, as the email address is associated with the verified domain connected to SendGrid. If SendGrid was not connected, ClickFunnels would use default internal mail server.