This article will review the WhatsApp Chat Inbox Configuration. This option allows you to create a specific inbox for the customers who send you messages via WhatsApp.
To create this inbox, you need to configure your Facebook Developer App and a System user inside your Facebook Business account.
Requirements:
An active ClickFunnels 2.0 account
A Facebook Business Account
Important Note: Before you get started with MessageHub, you'll need to:
Configure your Marketing Settings
Buy or Configure a Custom Domain
Add an Email Address on a Custom Domain and Set up DKIM
Configure your Facebook Developer App:
Visit the WhatsApp Cloud API Guide and follow the steps in “Set up Developer Assets and Platform Access” to create your Developer App.
Configure your required phone numbers in the WhatsApp section of your Facebook developer app. (See the image below for reference.)
Phone Number ID and WhatsApp Business Account ID are required fields in MessageHub that we will use later.
Important Note: If you have any questions regarding these steps, please contact Facebook Support.
Configure a System User for your Facebook Business Manager:
Visit this guide to create your System User for your Facebook Business Manager.
Important Note: When generating the access token, select the whatsapp_business_management and whatsapp_business_messaging permissions.
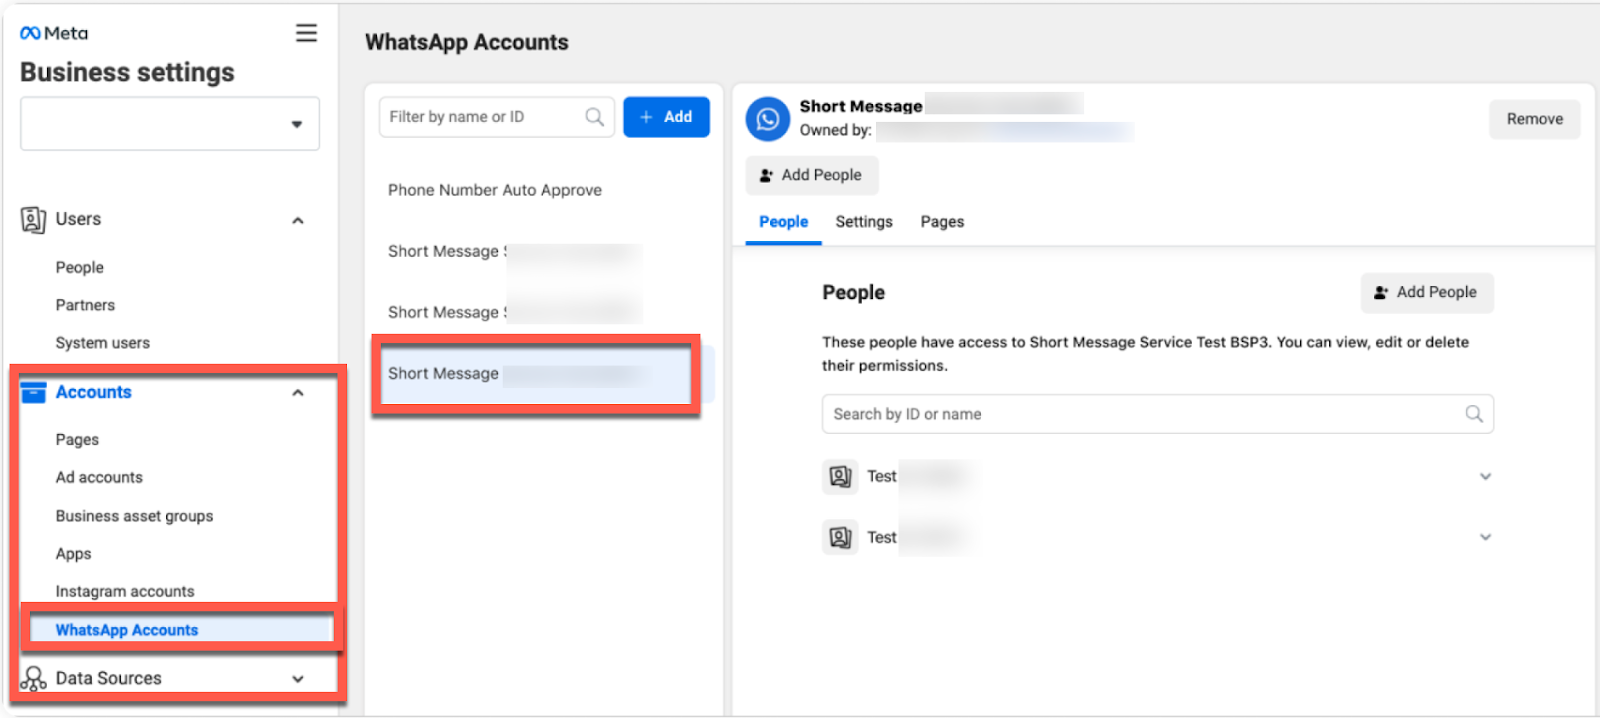
Select the System User to grant access to the WhatsApp Business Account. (See the image below for reference.)
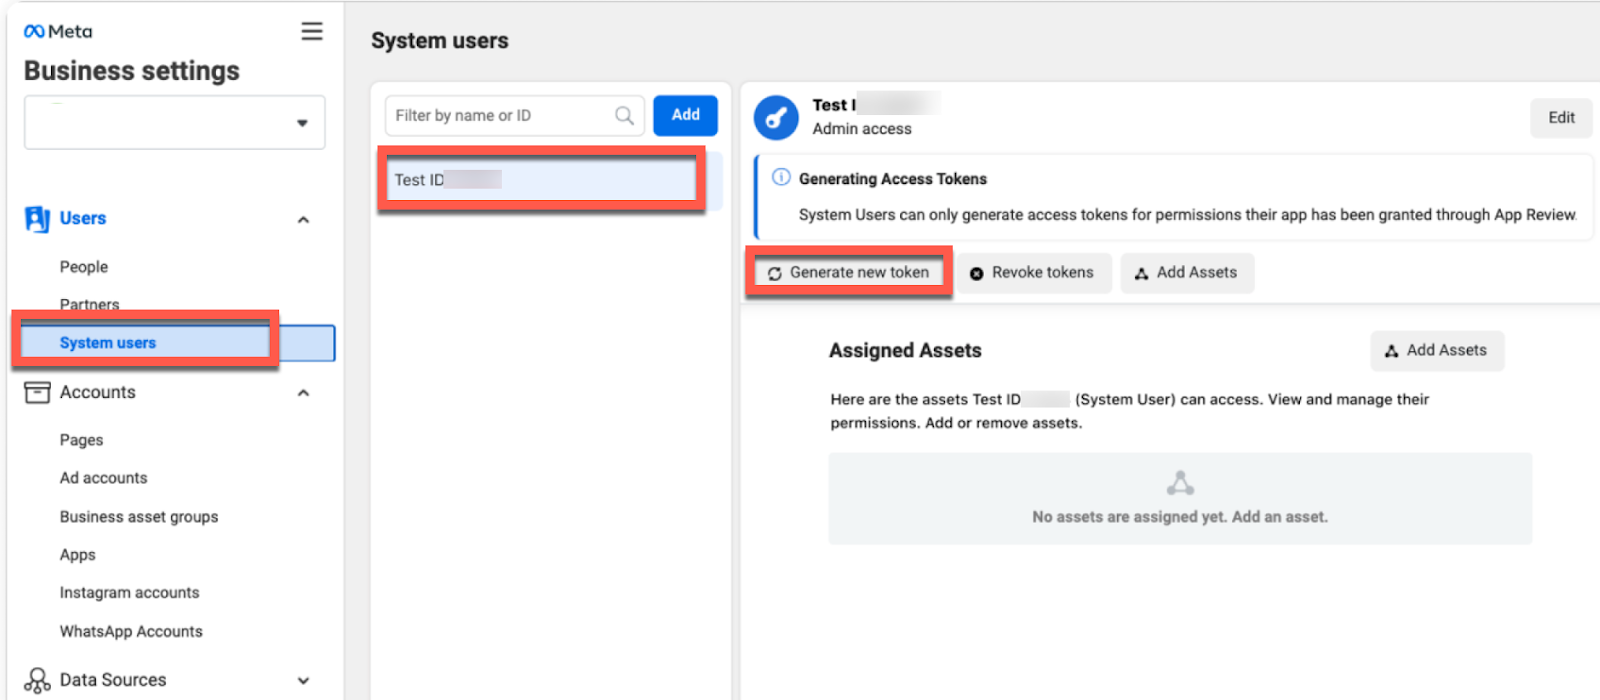
Generate the access token. (See the image below for reference.)
Important Note: If you have any questions regarding these steps, please contact Facebook Support.
Create your WhatsApp Chat Inbox:
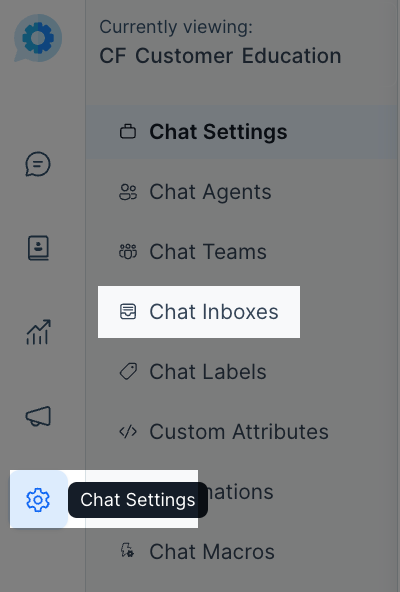
From the left menu, click Chat Settings, then Chat Inboxes.
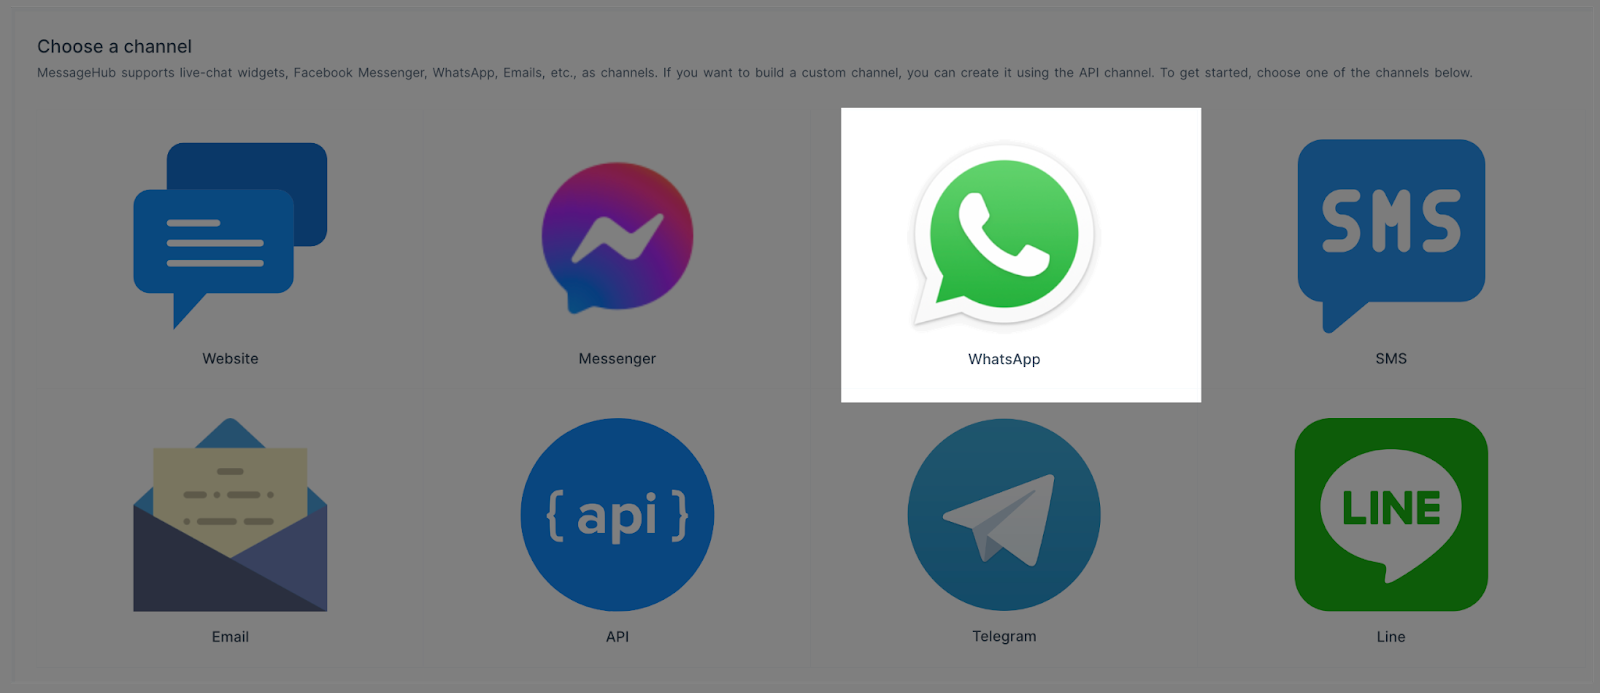
Select the WhatsApp option.
Complete this information:
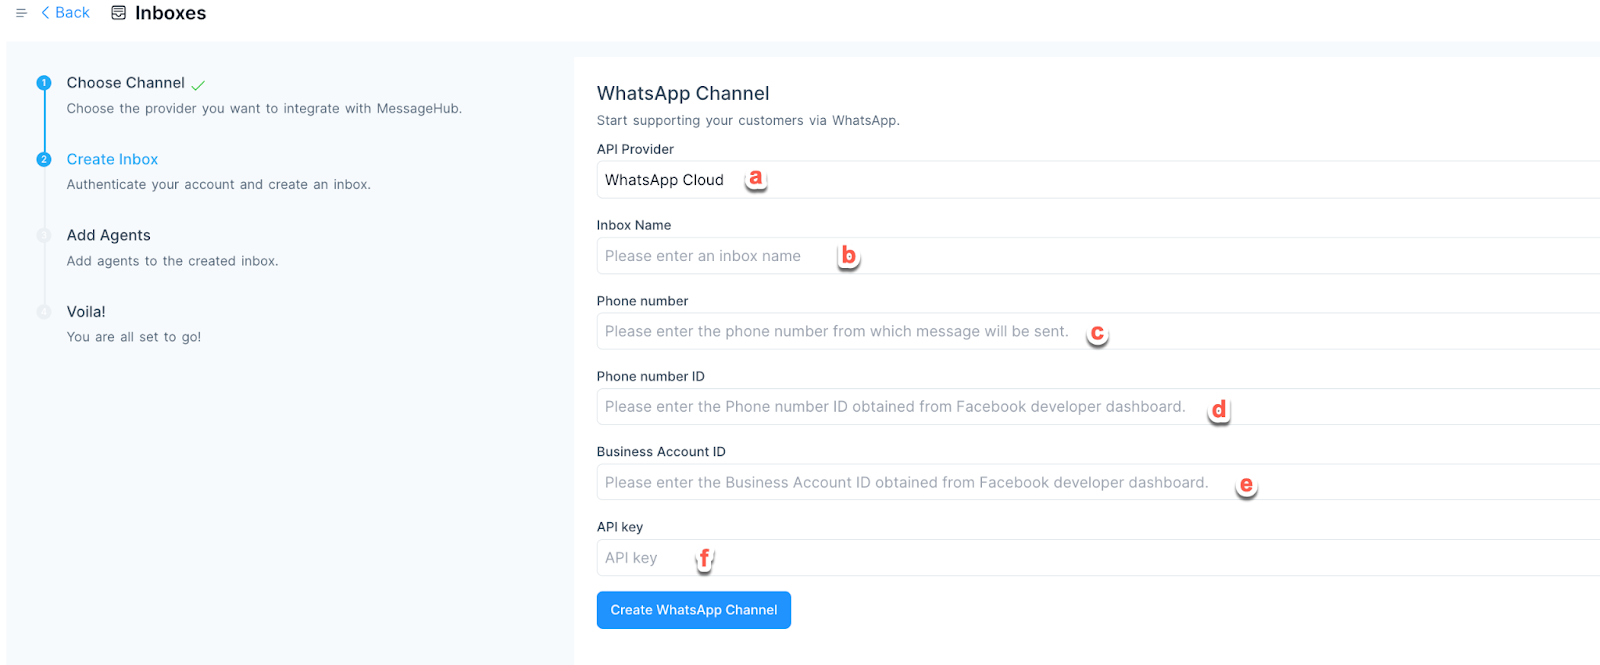
Select the WhatsApp Cloud option from the drop-down menu.
Add a Name for your Inbox.
Add the phone number listed in your Facebook Developer App.
Add the Phone Number ID generated in “Configure your Facebook Developer App.”
Add the Business Account ID generated in “Configure your Facebook Developer App.”
Add the API key, which is the token generated in “Configure a System User for your Facebook Business Manager.”
4. Select the Agents with access to this inbox and click Add Agents.
5. You have successfully created your WhatsApp Chat Inbox.
