Course System Emails in ClickFunnels are automated messages sent to your students at key points in their learning journey. These emails help keep your students engaged, informed, and on track with their course progress. They’re essential for maintaining communication and enhancing the overall learning experience. This article will show you how to effectively manage these emails and customize them for your needs.

Requirements
An active ClickFunnels account
A Course
Accessing Course System Emails
Navigate to Workspace Settings in the left-side menu.
Select System Emails.
Click on the Courses tab.
Types of Course System Emails
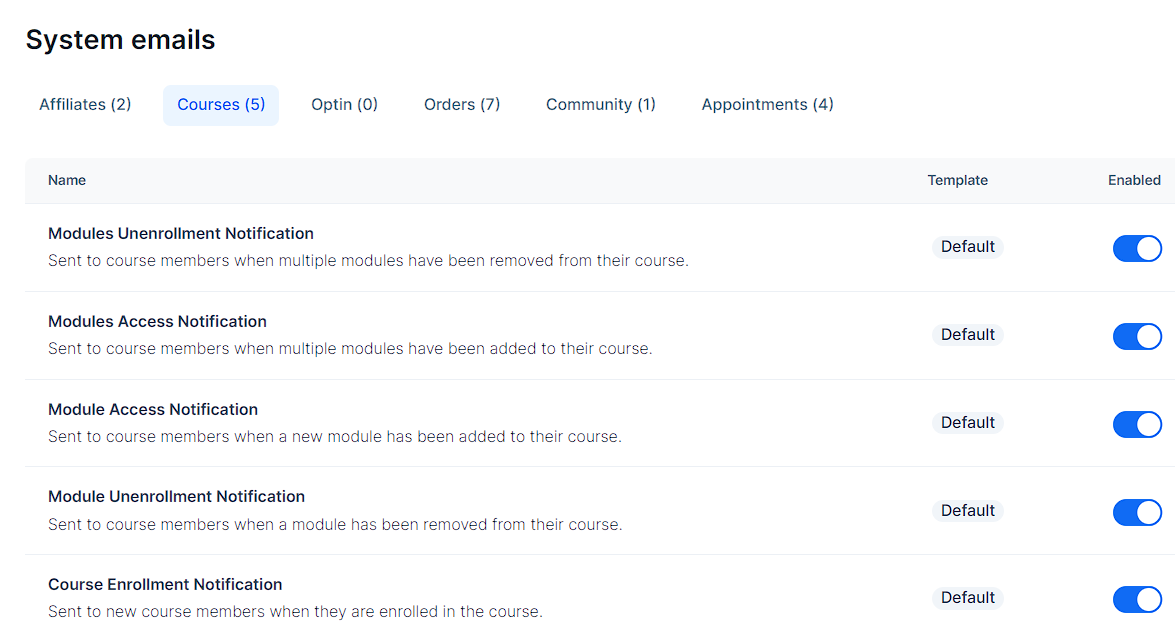
ClickFunnels offers several types of Course System Emails to keep your students informed about changes and updates to their courses. Each of these email types serves a specific purpose in keeping students updated about changes to their course structure. They all use a default template and can be enabled or disabled as needed using the toggle switch shown in the image. Here are the main types of Course System Emails available:
Modules Unenrollment Notification: Sent to course members when multiple modules have been removed from their course.
Modules Access Notification: Sent to course members when multiple modules have been added to their course.
Module Access Notification: Sent to course members when a new module has been added to their course.
Module Unenrollment Notification: Sent to course members when a module has been removed from their course.
Course Enrollment Notification: Sent to new course members when they are enrolled in the course.
How to Manage Course System Emails
Enabling and Disabling Emails
You can easily control which Course System Emails are sent by using the toggle switch next to each email type. Enabling emails ensures your students receive important notifications about course changes. This helps keep them informed and engaged. Disabling emails can be useful if you’re making multiple changes to your course and want to avoid sending too many notifications at once. Here’s how:
Navigate to the Courses System Emails tab.
Locate the email type you want to manage.
Click the toggle switch to enable or disable the email.

Customizing Email Templates
To personalize your Course System Emails:
Click on the email type you want to customize from the list.
In the email settings page, find the Use custom template toggle and switch it on.
Click the Edit custom template button that appears.
You’ll be directed to the email editor where you can design your email as desired. For detailed instructions on designing your emails, please refer to our How to Design Emails article.
Customize the Subject line:
Enter your desired subject in the Subject field.
Use the Merge tags feature to add dynamic content if needed. For more information on using merge tags, refer to our Using Merge Tags in Emails article.
Click the Save button at the bottom right of the screen to save your changes.
Click the Reset email to default button at the bottom left if you want to revert to the original template.
To learn more about managing system emails, refer to the How to Customize and Manage System Emails in ClickFunnels article.