In this article, we will cover an Overview of the Pages Section located within Site & Funnels. Below is a video to help you get started!
Requirements:
An active ClickFunnels 2.0 account.
While you do not need previous knowledge to use this lesson, you may benefit from completing Introduction to ClickFunnels 2.0.
How can you provide content for your audience and visitors when they visit your website? You can build individual web pages for your site or funnels by creating pages. This allows you to make specific pages with targeted content for frameworks like funnels and courses. The Pages section of your ClickFunnels account has the structure for creating and managing your pages.
The Pages Section Layout
Accessing the Pages Section
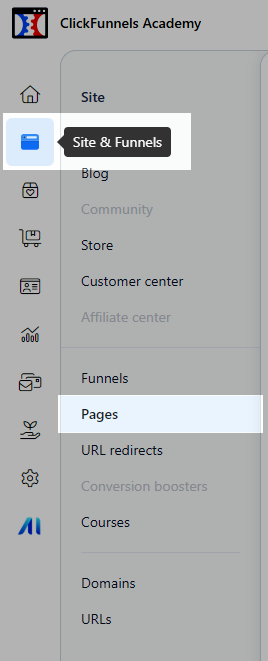
In your account, click the Site and Funnels button on the left-hand side of your screen.

Click on the Pages button in the sub-menu on the left-hand side of your screen.
The Pages Dashboard
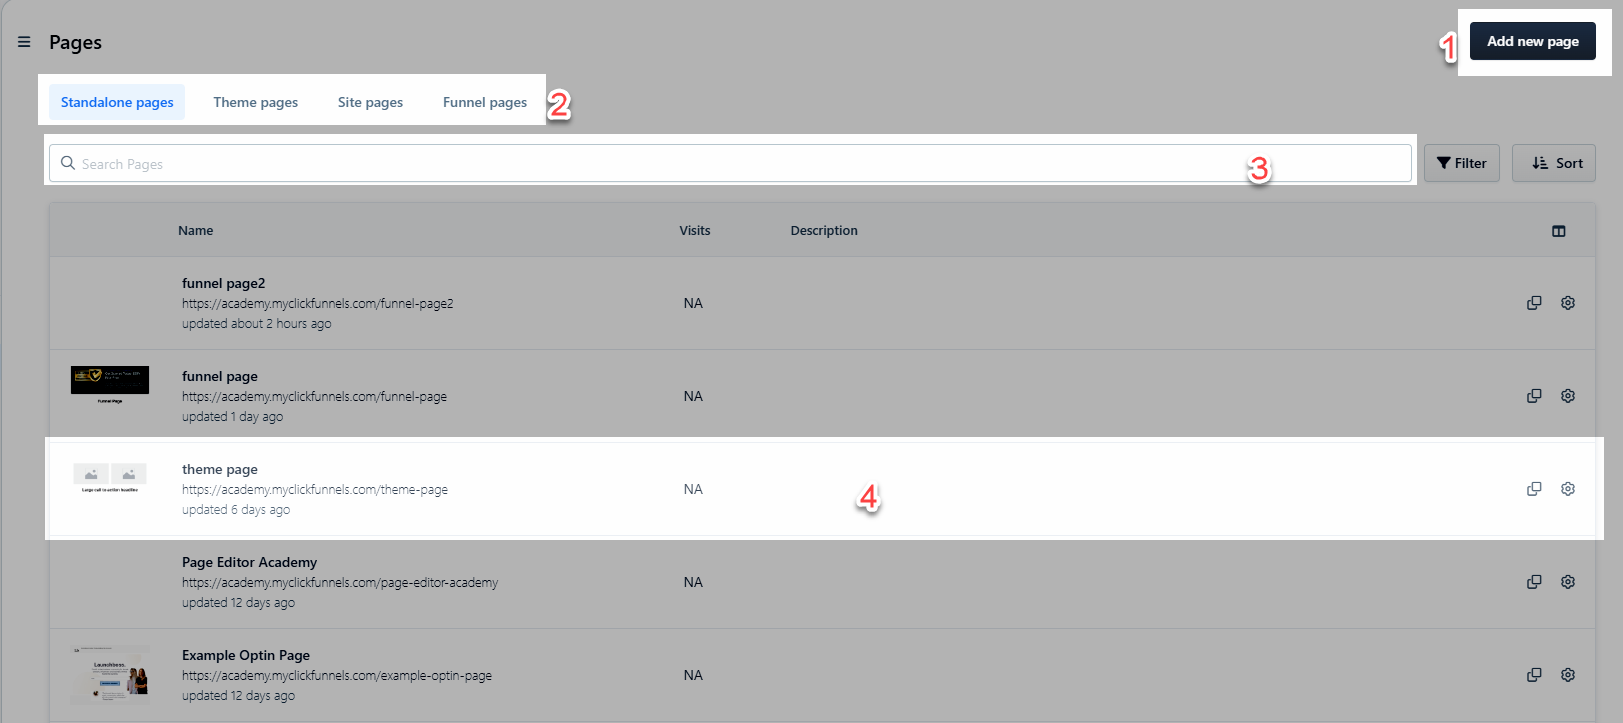
The Pages Dashboard shows you your existing pages, shows some extra information about each page, and lets you build new pages.

Clicking on the black Add New Page button will create a new funnel.
The course filter has options for filtering the displayed pages. The filters are as follows;
Standalone Pages: This displays all pages not associated with a Theme, Site, or Funnel in your account.
Theme Pages: This displays all pages that are set as Themes in your account.
Site Pages: This displays all pages for a site in your account.
Funnel Pages: This displays all pages for funnels in your account.
This search bar allows you to search for pages by name.
This is an example of a created page. The page listing shows the page name, the number of visits the page has received, and any set description. To the right of the description field are options to clone the page and adjust the page settings.
Clicking on the page name will open the page editor. You can change the page layout, appearance, and content. The page editor will be described in more detail in a subsequent lesson.
The Page Settings Editor
Clicking on the gear icon to the right of a page listing on the page dashboard will open up the Page Settings window.

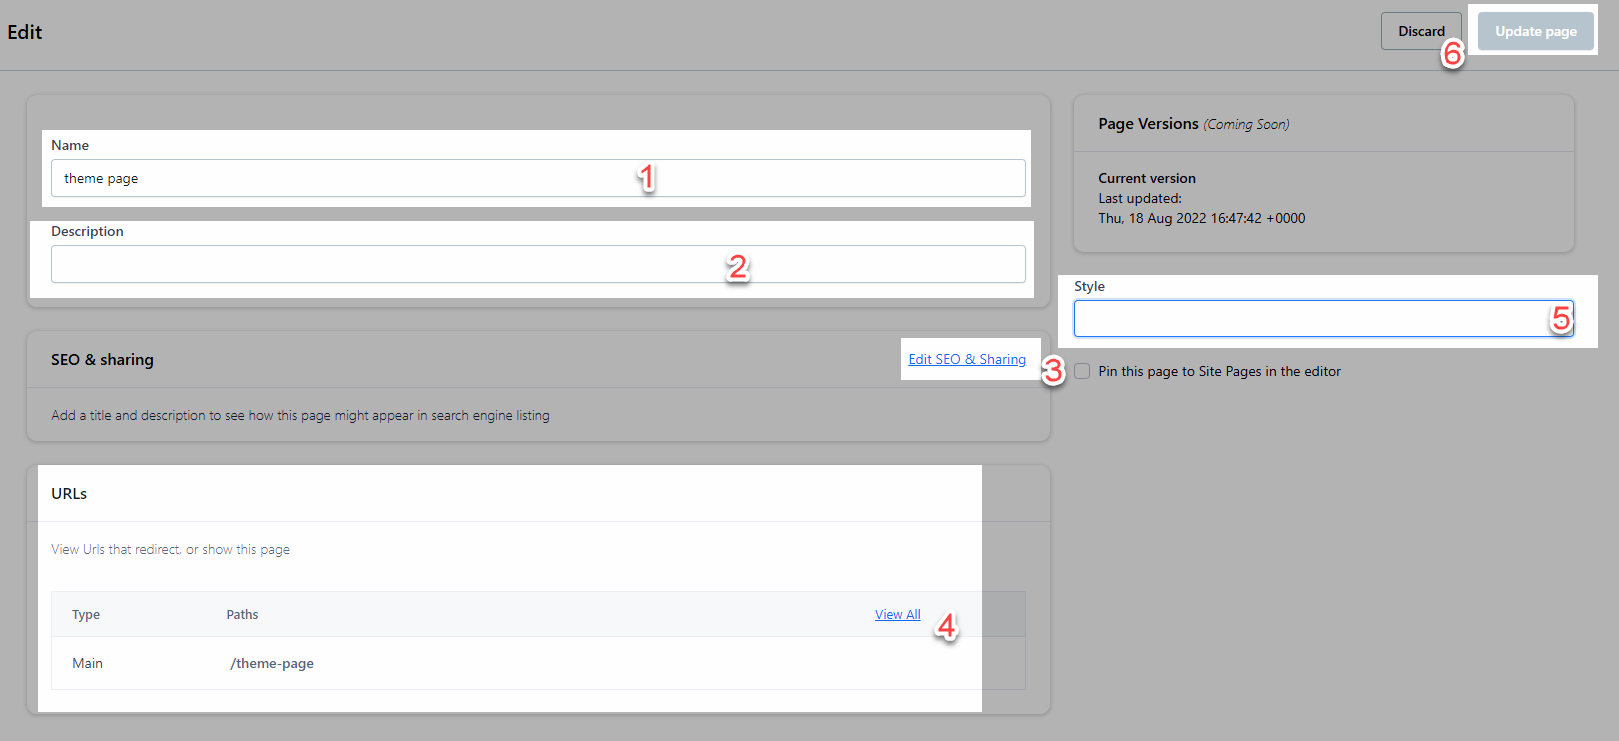
You will now see the Page Settings Editor. It appears as follows:

This is the Page Name field, originally set when the page is created. You can update the page name by editing this field.
This is the Description field. This description is optional but can be used to describe the contents or intent of this page. This affects the Page Description seen on the Created Pages in the Pages dashboard.
This button will take you to the SEO & Sharing settings. Via this link, you can adjust the SEO settings for your page.
This shows all URL’s that point to this page. You can use this to track where traffic can come from.
This drop-down field allows you to choose a Style for your page. Setting up a Style allows you to create a new page more quickly by pre-setting some layout and font choices.
When you have completed your changes in this page, select Update Page to save those changes.
If you have any questions about this, please contact our Support Team by clicking the Support Icon in the bottom right-hand corner of this page.