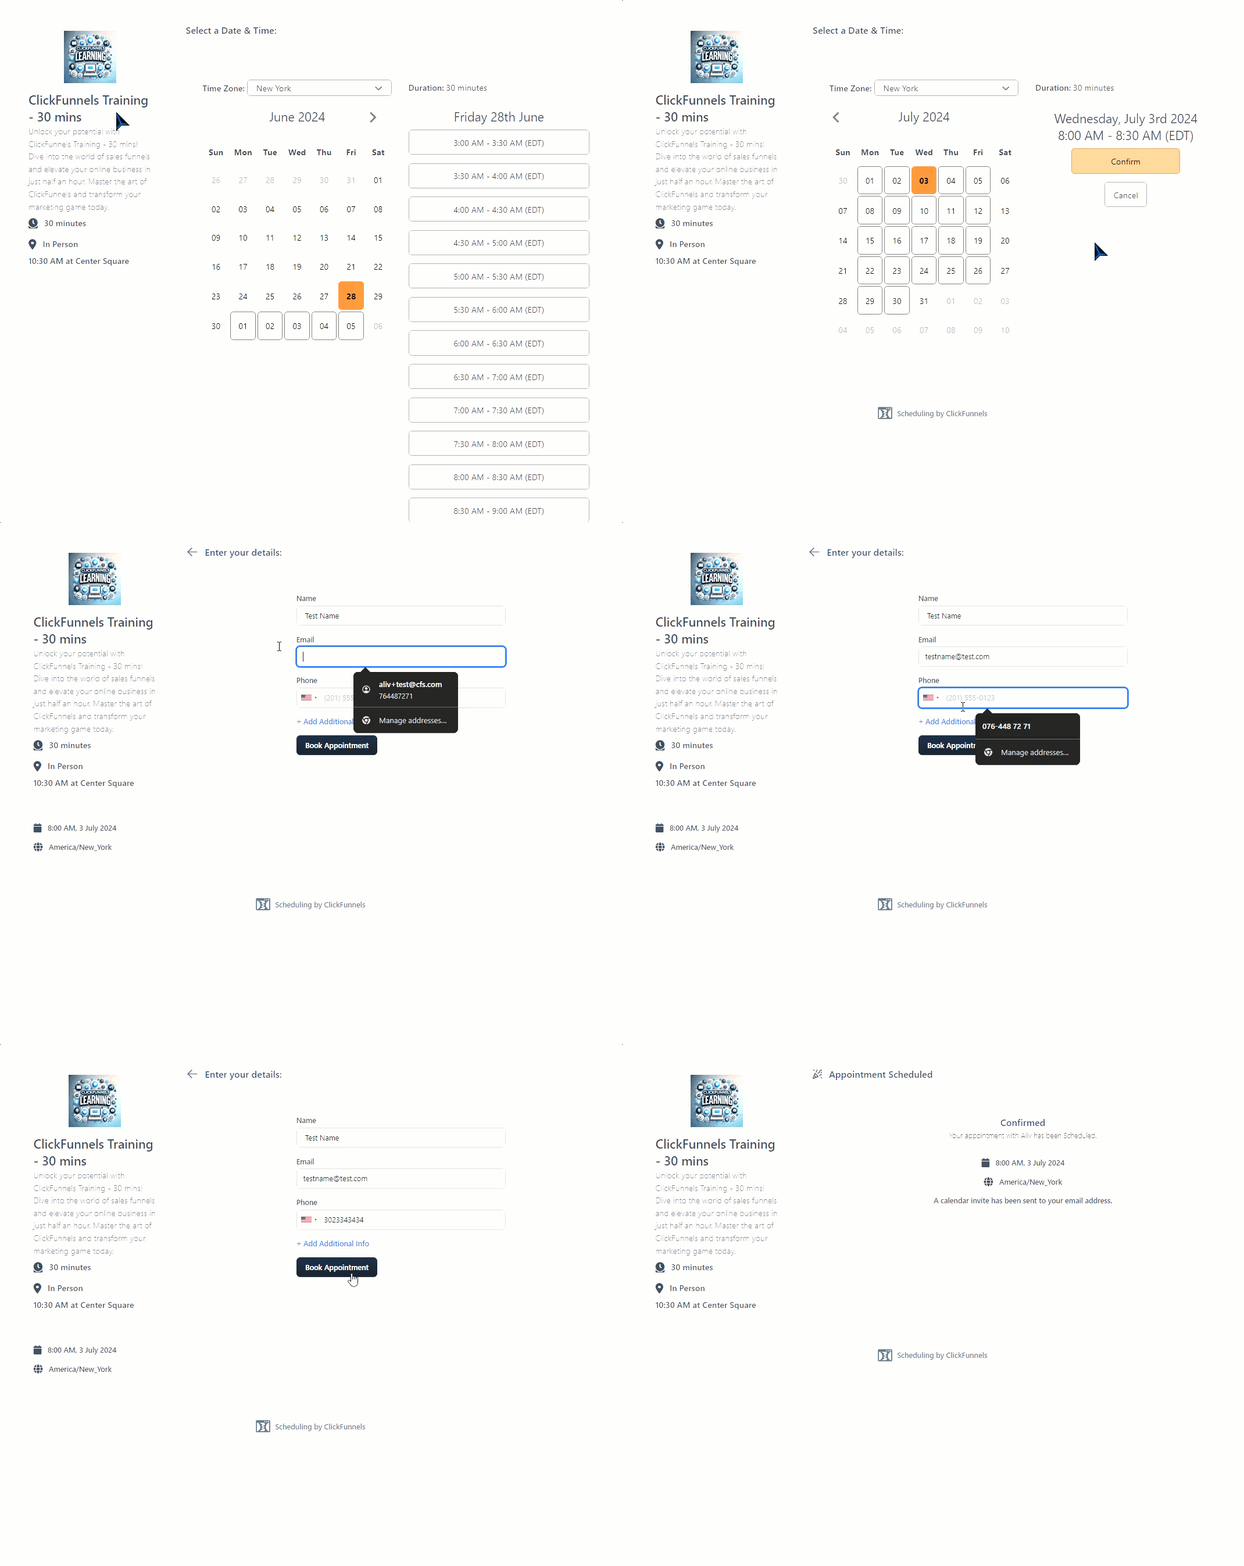
Tired of juggling emails and phone calls to schedule appointments? ClickFunnels Appointments is here to streamline your workflow and empower your clients to book with you directly. Efficiently managing appointments and event scheduling is crucial for any business, and ClickFunnels offers a robust Appointments app to streamline this process. This intuitive app seamlessly integrates with your existing calendar and conferencing tools, letting you create different event types, manage your availability, and simplify the scheduling process for everyone.

This article will introduce you to the core functionalities of ClickFunnels Appointments and get you started on the path to effortless booking!
What is the ClickFunnels Appointments?
The ClickFunnels Appointments is a powerful tool that allows you to easily manage and schedule various types of events, such as meetings, consultations, or training sessions. This feature ensures that your invitees can book time with you without the hassle of back-and-forth communication. By integrating your calendar, setting up event types, and adding conferencing connections, ClickFunnels Appointments makes scheduling straightforward and efficient.
Example:
Imagine you are a fitness coach offering one-on-one training sessions. With “ClickFunnels Appointments”, you can create an event type called “Personal Training Session,” set the duration to 60 minutes, and link it to your Google Calendar. Your clients can then see your available time slots and book a session that fits their schedule. Additionally, you can add a Zoom conferencing connection so clients can join the training session virtually, directly from the calendar invite they receive after booking.
This streamlined process not only saves time but also ensures that all your appointments are organized and easily accessible in one place.
Benefits of Using Appointments
Efficient Scheduling: Automate the booking process, reducing the back-and-forth communication with your clients.
Calendar Integration: Sync events with your calendar, ensuring all appointments are up-to-date and avoiding double bookings.
Customizable Event Types: Tailor events to fit your specific needs, whether it’s a one-on-one meeting, sales call, training session, or group meeting.
Seamless Conferencing: Integrate with conferencing tools like Google Meet, Zoom, Team, and GoTo allowing invitees to join meetings directly from their calendar invites or confirmation emails.
Improved Productivity: Save time and reduce administrative tasks by managing all your appointments in one centralized system.
Adding Appointments App in the Workspace
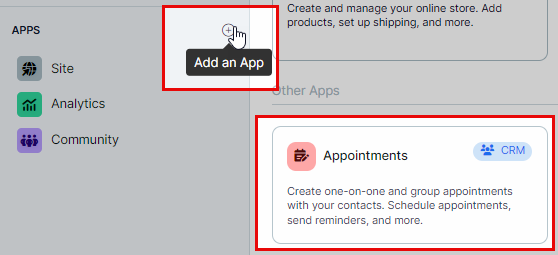
From the main menu on the left, click on + Add an App to navigate to the Apps page.

Scroll down until you find the Appointments app, then click on it.
Confirm your selection by clicking the Add App button.
How the ClickFunnels Appointments App Works
The ClickFunnels Appointments app offers a structured process to create appointments, allowing clients to book time with you seamlessly while you efficiently manage scheduled appointments. This app enables you to connect your calendar, set up your availability, add conferencing connections, and create various event types. Follow the steps below to get started and optimize your appointment management workflow.
Connect Your Calendar:
Navigate to the Calendar Connections sub-menu in the Appointments app.
Link your preferred calendar (e.g., Google Calendar, Outlook) to ensure all events are synced and up-to-date.
For more details, visit the Appointments - How to Connect and Manage a Calendar.
Set Up Your Availability:
Go to the Availability Schedules sub-menu in the Appointments app.
Define your available time slots, ensuring invitees can only book during your free periods.
For more details, visit the Availability Schedules - Define Your Availability for Appointments.
Add a Conferencing Connection:
Navigate to the Conferencing sub-menu in the Appointments app.
Integrate tools like Zoom, GoTo, or Microsoft Teams.
Ensure that invitees can join the meeting directly from their calendar invites or confirmation emails.
For more details, visit the Appointments - How to Add a Conferencing Connection.
Create an Event Type:
Go to the Event Types sub-menu in the Appointments app.
Click on Add Event Type and select an event type (e.g., One-on-One, Group Session).
Fill in the necessary details such as event name, domain, location type, calendar, event duration, after-booking confirmation, and event notifications.
Click Create Event Type to create the event.
For more details, visit the Appointments - How to Create and Manage Event Types.
Reaching Your Clients: Publishing Your ClickFunnels Appointments
Once you’ve created your event type and configured your availability in ClickFunnels Appointments, it’s time to make it accessible to potential clients!

Share the Event Link:
ClickFunnels provides a unique link for your appointment event. Share it on your website, landing pages, or email campaigns.
Embed the Booking Form:
ClickFunnels offers an iframe code to embed the booking form directly into your funnel or web pages. This allows clients to schedule appointments without leaving your site.
For more details, visit the How to Publish Your ClickFunnels Appointments.
Managing Scheduled Events
Managing your scheduled events essentially means keeping track of all confirmed appointments, including the ability to view details, reschedule if needed, or even cancel appointments under certain circumstances.
Let’s imagine a scenario. You’re a busy life coach and you’ve used ClickFunnels Appointments to offer one-on-one coaching sessions. Clients have booked appointments throughout the week in 30-minute slots. What if something unexpected comes up on your end? ClickFunnels Appointments empowers you to manage your schedule with flexibility. Perhaps an urgent client matter arises, or you need to run a quick errand. No problem! Through the Scheduled Events menu, you can easily reschedule the appointment for a more convenient time, or even cancel it entirely if needed. The feature allows you to communicate these changes directly to your client through automated emails, keeping them informed and ensuring a smooth experience.
You can easily view, reschedule, cancel, and edit your scheduled events from the Scheduled Events menu in the “Appointments” app. To manage your scheduled events, follow these steps:
Navigate to the Appointments App: Go to the ClickFunnels dashboard, click on Appointments in the left-hand menu, and select Scheduled Events from the submenu.
View and Manage Events: Here, you will see a list of all your booked appointments. You can reschedule, cancel, or edit events directly from this list.
For detailed instructions on managing scheduled events, visit the Appointments - How to Manage Scheduled Events article.
Appointments FAQs
Can I customize the booking page?
Yes, you can customize the primary color and logo of the booking page to match your brand.
Can I embed the booking form on an external page or site?
Yes, you can copy the embed code and paste it into the HTML code editor of your external page or site.
How do I handle cancellations or rescheduling?
Invitees can cancel or reschedule their appointments using the links provided in their confirmation emails. As an admin, you can manage and adjust booked appointments through the “Scheduled Events” sub-menu.
Can I limit the number of appointments per day?
Yes! ClickFunnels Appointments allows you to set a maximum number of bookings for each day, ensuring you don’t get overloaded.