MessageHub’s Chat Teams allows you to organize your support agents based on their expertise or responsibilities. By creating and managing teams, you can efficiently handle various types of customer inquiries, such as technical issues, billing questions, or product-related concerns. This article guides you through the process of creating Chat Teams in MessageHub and explains how to manage them effectively.

Requirements
An active ClickFunnels account
The MessageHub App.
At least one agent added to your MessageHub
Understanding Chat Teams
Chat Teams in MessageHub are groups of agents organized based on their skills, responsibilities, or the types of inquiries they handle. Benefits of using Chat Teams include:
Efficient routing of customer inquiries to the right experts
Improved response times for specialized questions
Better workload distribution among your support staff
Enhanced collaboration within specialized groups
Agents can be members of multiple teams, allowing for flexible support structures.
Adding a New Chat Team
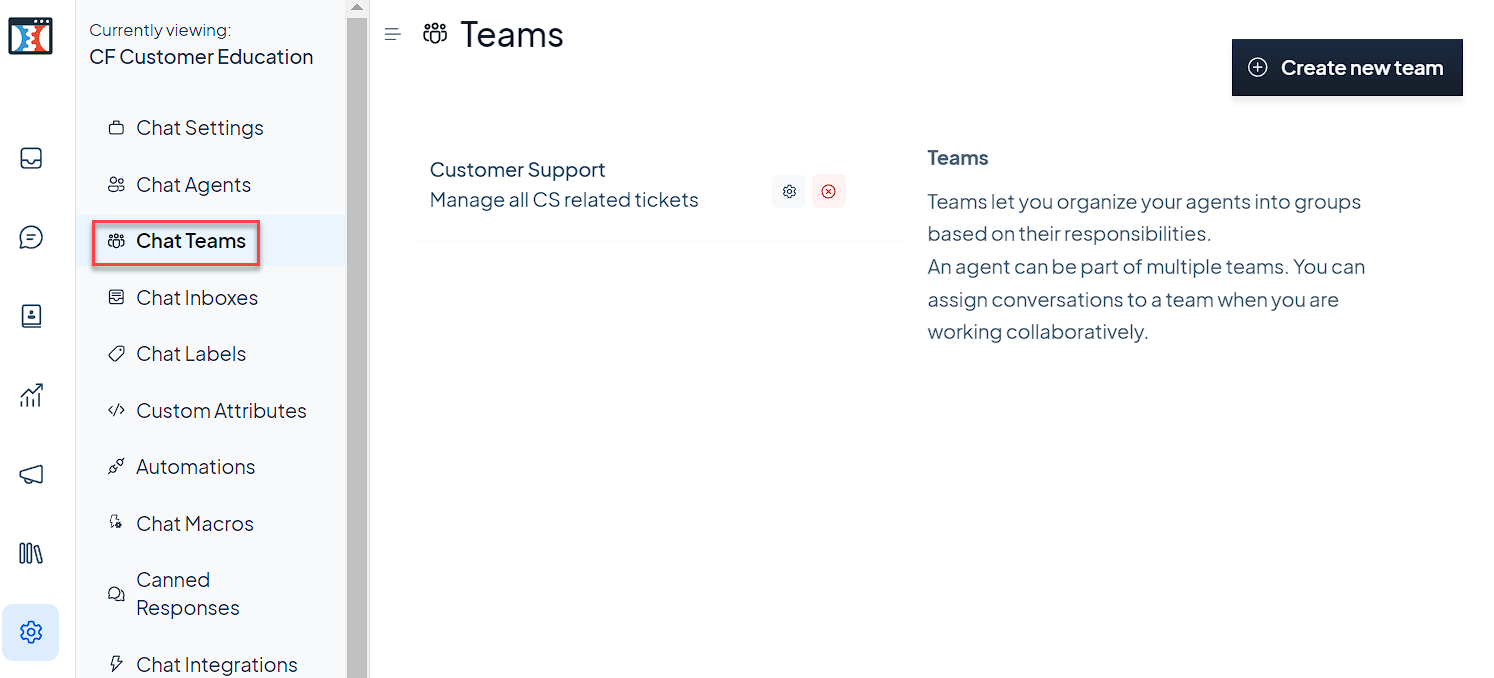
Navigate to Settings ⚙ > Chat Teams in your MessageHub dashboard.
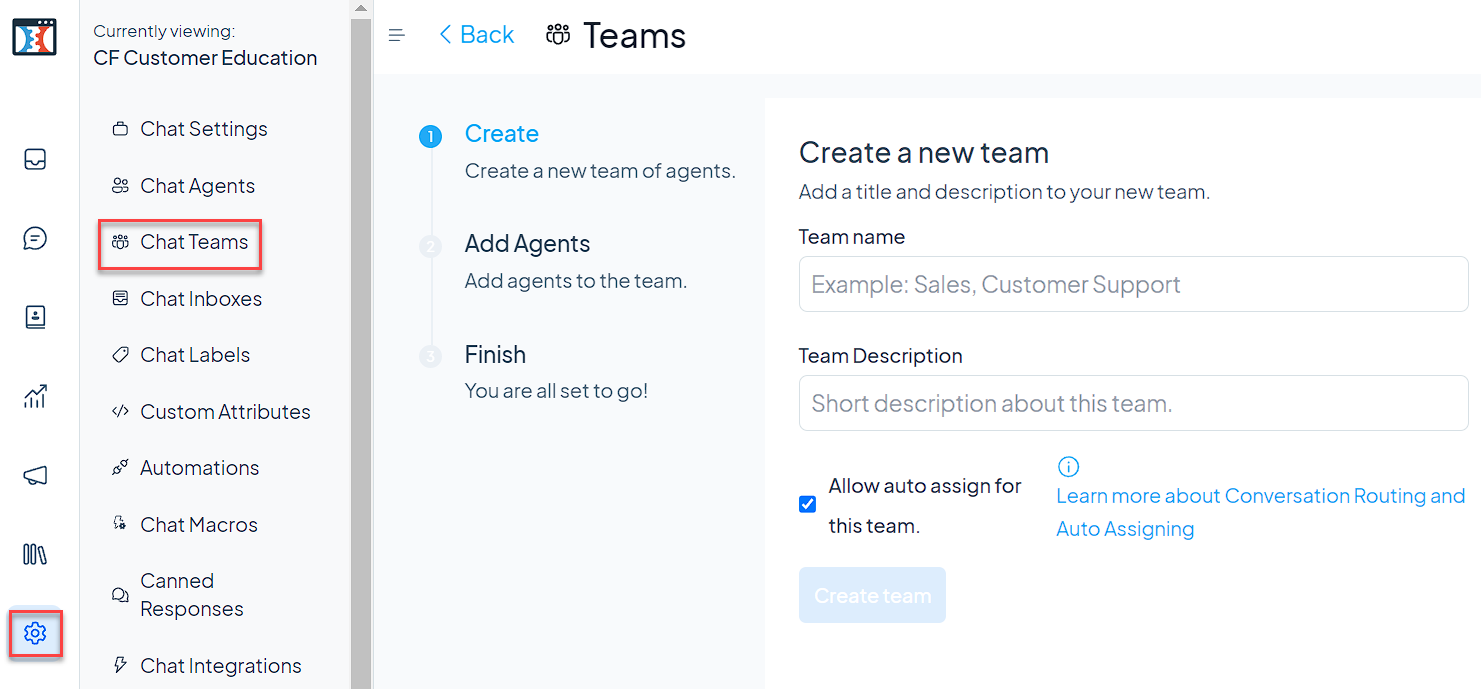
Click on Create new team at the top right of the page.
Enter the team details:
Team Name: Choose a descriptive name (e.g., “Technical Support” or “Billing Inquiries”).
Description: Briefly explain the team’s purpose or responsibilities.

Check the box next to Allow auto assign for this team if you want MessageHub to automatically assign conversations to members of this team. For more information, refer to our Routing Conversations article.
Click Create team to confirm.
You’ll be presented with a list of available agents. Select the agents you want to add to the team.
Click Add Agents to confirm your selection.
Review your choices and click Finish to complete the process.
Managing Chat Teams
Navigate to Settings ⚙ > Chat Teams in your MessageHub dashboard.
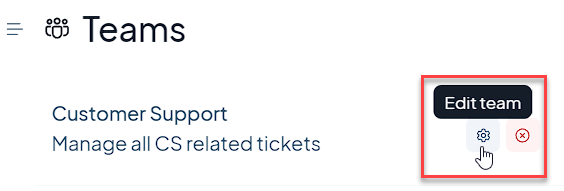
Find the team you want to modify and click on the settings ⚙ icon next to its name.

You’ll see a multi-step process on the left side of the screen: Team details, Edit Agents, and Finish.
In the Team details step:
Modify the Team name if needed.
Update the Team Description.
Check or uncheck Allow auto assign for this team option.
Click Update team to save these changes.
This will take you to the Edit Agents step:
You’ll see a list of all available agents.
Check or uncheck the boxes next to agent names to include or exclude them from the team.
Click Update agents in team to save your changes.
Click Finish to complete the process
Deleting a Chat Team
Navigate to Settings ⚙ > Chat Teams and locate the team you want to delete.
Click on the delete icon to the right of the team name.

In the confirmation dialog, type the team name to confirm.
Click Delete [team name] to permanently remove the team.
WARNING
Deleting the team will remove the team assignment from the conversations assigned to this team.